
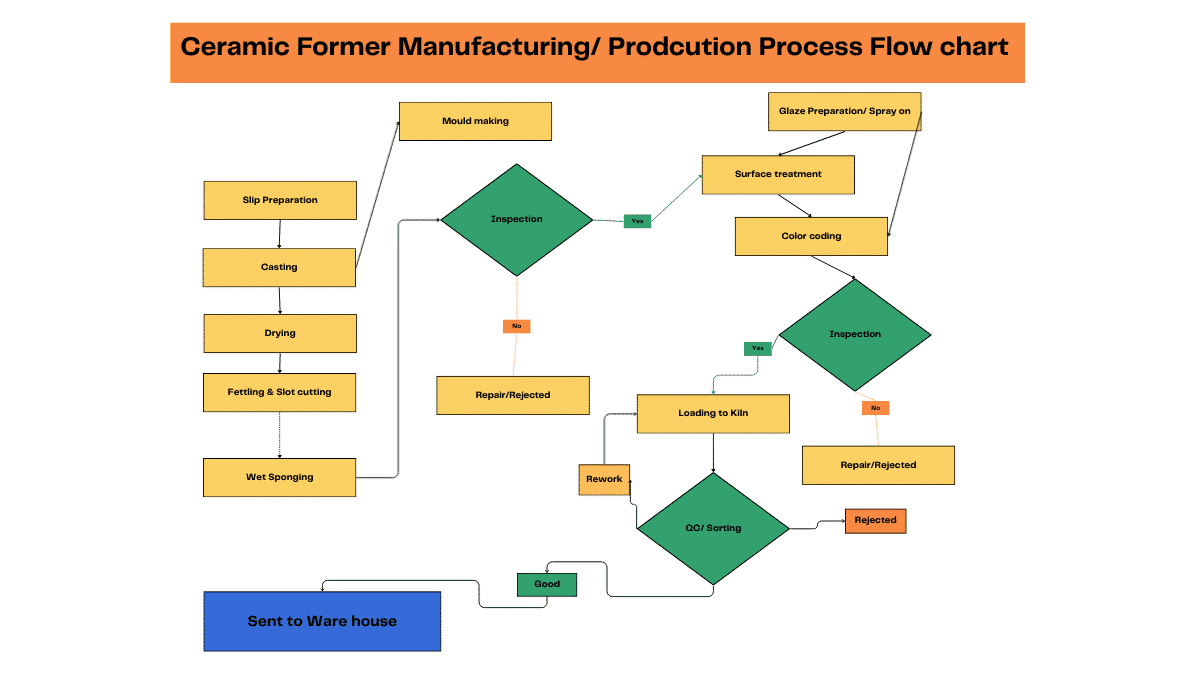
Ceramic formers production/manufacturing process consists of the following 10 steps.
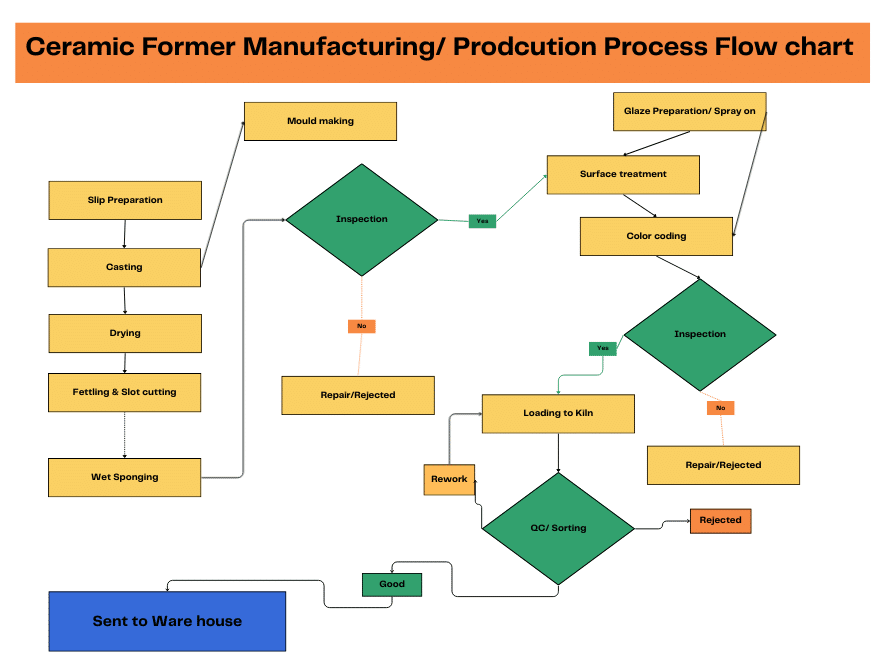
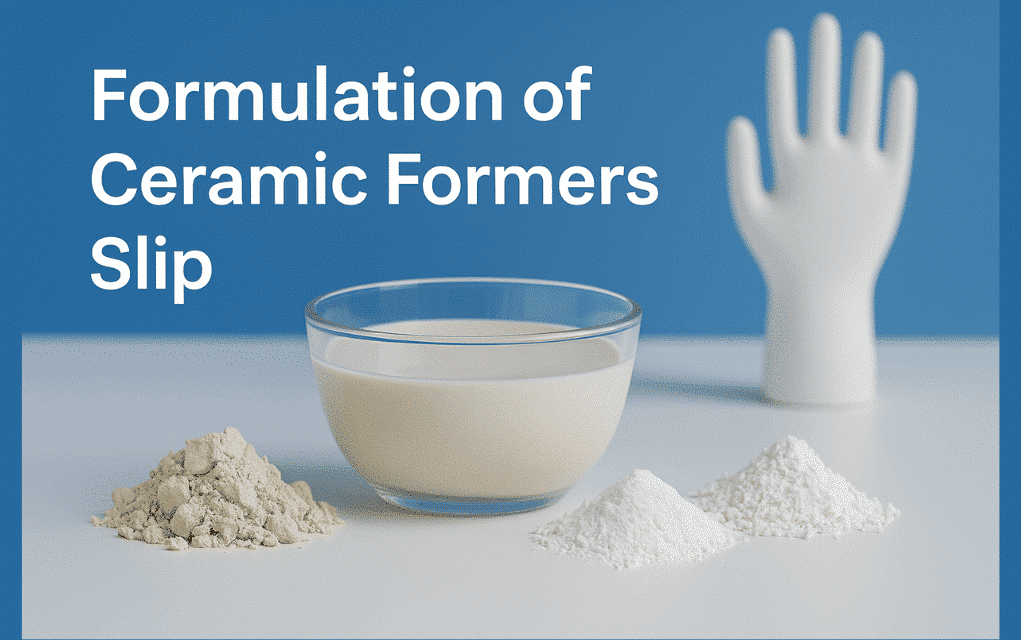
1. RM & Slip Preparation
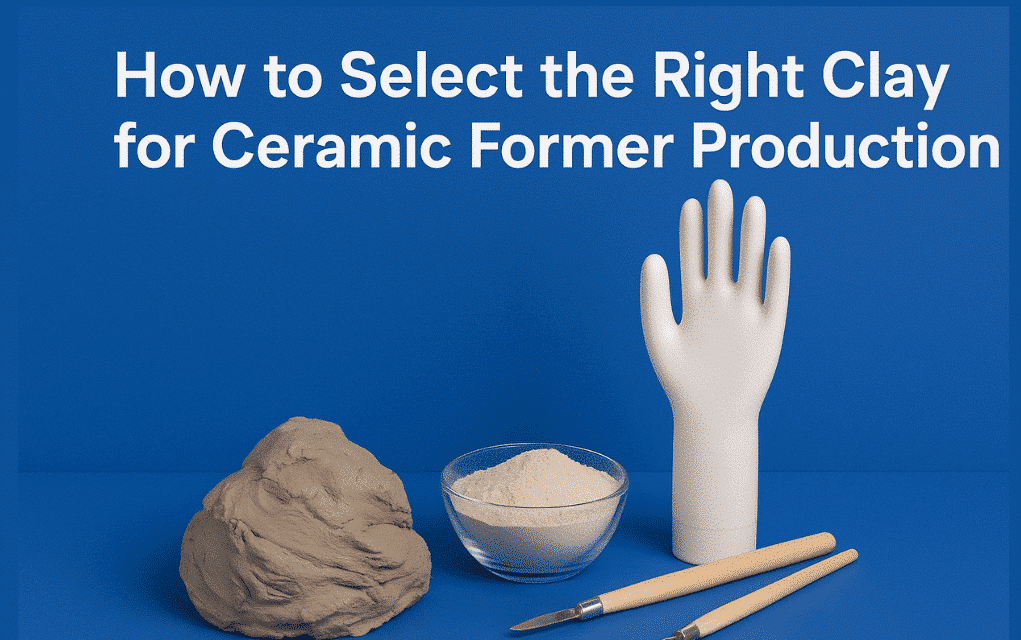
The ball clay, china clay, calcined alumina, quartz, and feldspar are mixed according to the former body formulation and charged into the ball mill. Deflocculants and water are added to achieve the required rheological properties.
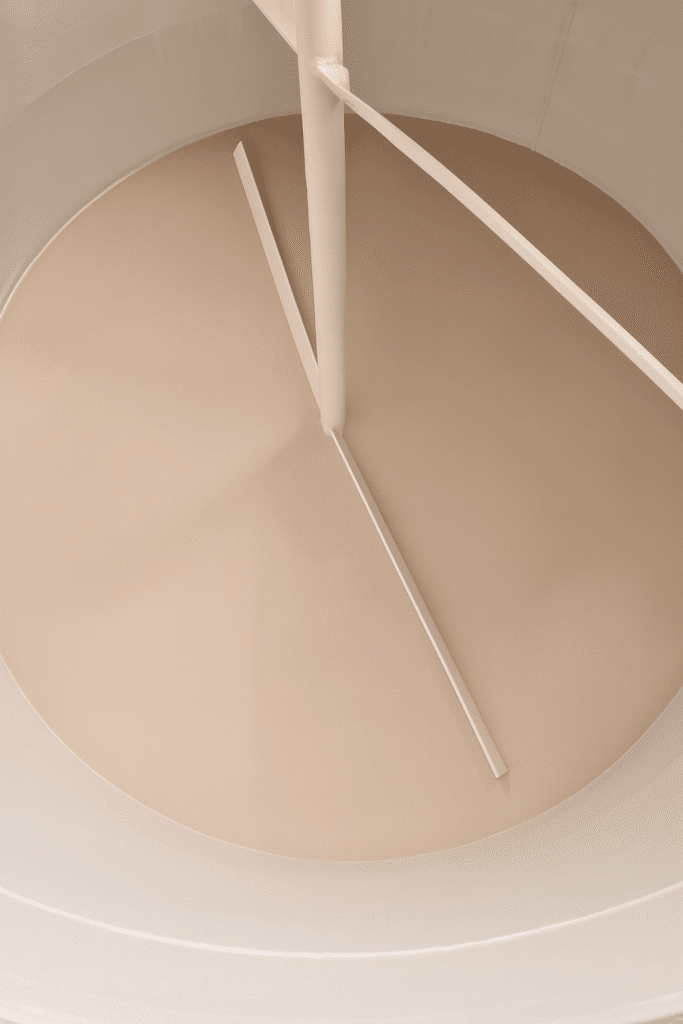
Once the milling is done, the slip is sieved through 80 and 120 mesh sieves and stored in a storage tank. The slip is allowed for minimum aging period of 3 days before it is transferred to the casting department.
2. Glaze and Mould:
The glaze preparation department works parallel to body preparation. It produces multiple colored glazes (applied at the base of the former) and a white or transparent glaze for body coating. Color glazes are normally purchased as ready-mix formulations and milled in-house. This helps manufacturers to reduce inventory of multiple color stains inventories. White glaze/transparent glaze raw materials are loaded into a ball mill and milled. Once the glaze passes the residue test, then it is sieved through a 200-mesh sieve and supplied for the glazing process.
Mould department uses block/case mould to produce the production mould required for the casting based on the production plan. After mould production, it is kept in the dryer before it is delivered to the casting department.
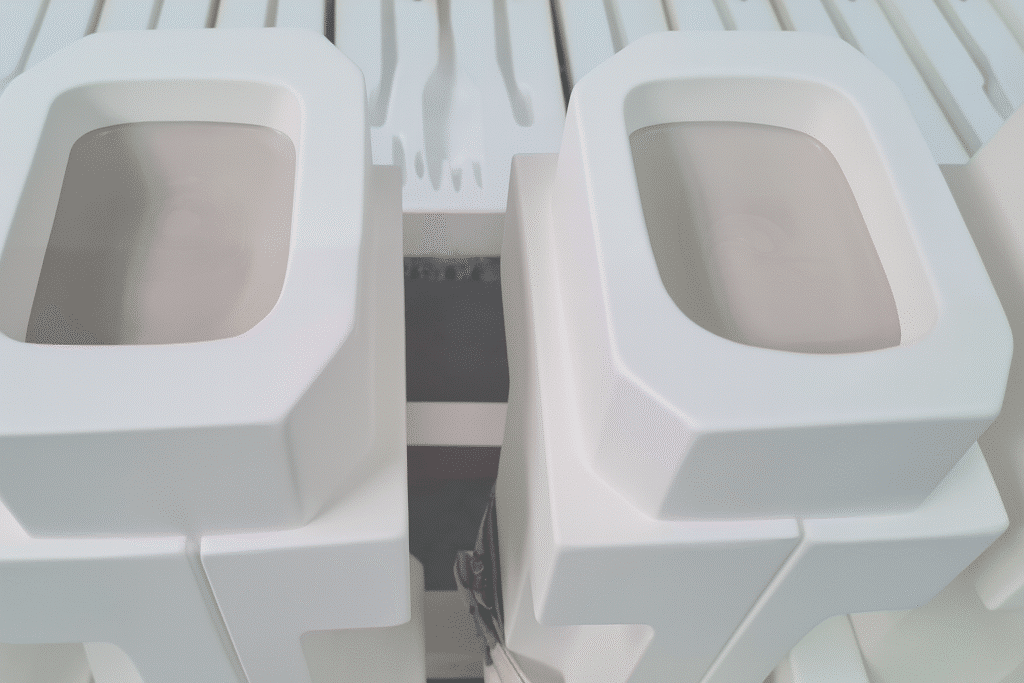
3. Casting & Drying:
The casting department uses mould from the moulding department and the slip from the storage tank to make the cast pieces. The cast time takes 30–45 minutes, after the excess slip is drained from the mould. Then the piece in the mould let for another 30-45 minutes to dry based on the slip drying behaviour and the atmospheric temperature. Once cast pieces get enough strength to handle , the pieces are demoulded from the mould and kept in the rack or on a conveyor.
These pieces will be allowed to dry for a day and then sent to the dryer. After drying, the moisture content of the pieces will be less than 1% and it is ready to send to the slot cutting & finishing process.
4. Slot Cutting & Fettling:
The following dry finishing processes will be carried out before wet finishing.
- Slot cutting: Ensures the base hole is accurate for conveyor mounting during glove production. A slot-cutting machine with blades is used to smooth the base hole in the pieces without any clay edges, and the generated clay particle will be removed and de-dusted. This process is to ensure that the bases of the former can be mounted during their end use in production.
- Fettling: The clay edges in the plaster mould joint will be removed using a knife. This process reduces the wet finishing. Once fettling is complete, the piece will be sent for finishing and inspection.
5. Finishing & Inspection:
Wet finishing is performed using a wet sponge to remove surface imperfections, pinholes, and rough patches.
After finishing, inspectors check each piece for cracks, pinholes, shape deformities, and surface defects. Minor defects may be repaired, while unrepairable pieces are rejected. Only approved formers will be sent to the surface treatment process.
6. Surface Treatment:
Based on the types of forms required, the surface treatment will be done. Some of the options are,
- Glazed (full or half): formers dipped into the glaze for the glazing process.
- Unglazed: light body spray may be applied for roughness; otherwise, it will be directly sent to the next process.
- Sandblasted: Sandblasting is done on the pieces based on the texture required, like full texture, palm texture, or finger texture.
- Spray on: The roughness or texture of the piece is improved by spraying the slip on the piece area like the palm or the full body.
After surface treatment, pieces undergo another inspection before moving to color coating.
7. Color Coating
The former’s color coating process is done by the dipping method. Excess glaze at the bottom is wiped using a wet sponge surface to prevent sticking to the pieces during firing.
After color coating, tracking details such as batch/date/caster/glazer codes are applied using stamps, or ceramic barcodes are also applied to the pieces for the purpose of backtracking.
8. Firing
The coated formers are loaded into kiln cars. Most manufacturers use shuttle kilns, while high-capacity plants use tunnel kilns to save kiln firing costs. For shuttle kiln firing, which happens around 18–24 hours, the peak temperature will be 1220–1250°C. After firing, the pieces are unloaded and sent for polishing & sorting.
9. Polishing & Sorting
Fired formers are polished according to the surface smoothness required and then sent to be sorted. The sorting team will conduct two types of checks: a dimensional check and a physical defect check. The sorting is done into three categories:
- Good pieces—no defect pieces and ready for packing
- Rework pieces—with minor defects such as pinholes—sent for rework & refiring.
- Rejected pieces—with cracks, deformation, or unreparable glaze defects—will be discarded.

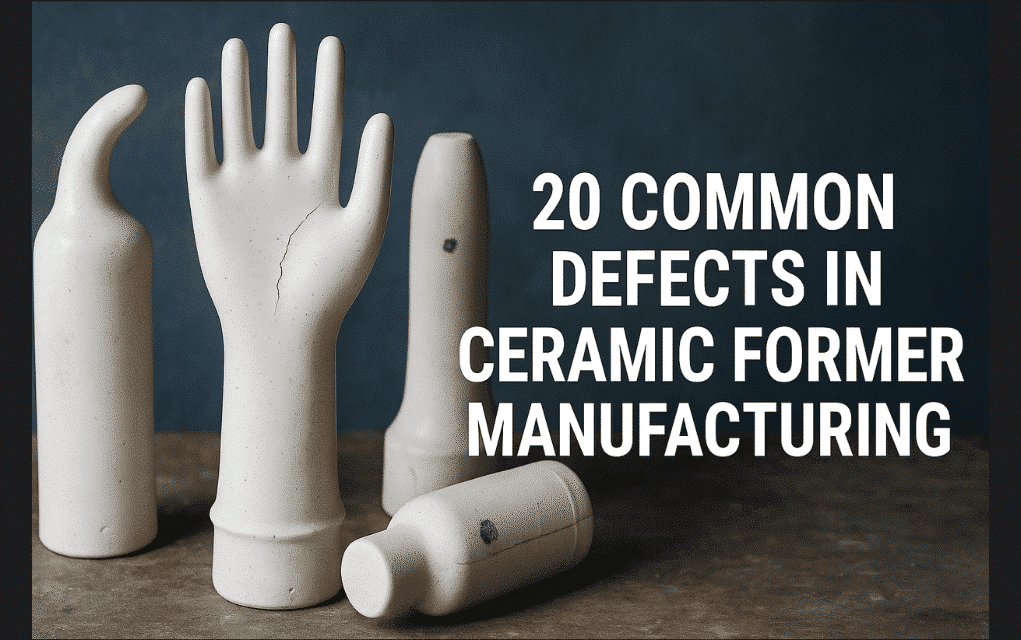
Common defects in ceramic formers are cracks, pinholes, black dirt, surface irregularities, under-firing, over-firing, and dimension failure.
10. Packing
The ceramic formers pieces will be packed securely and transferred to warehouses for dispatch to customers.
Lab & Modelling:
Other than the above-said departments, these two departments play a vital role in the production.
The lab helps check all the process parameters and finished product properties, like thermal shock resistance, water absorption, and roughness of the pieces.
Modelling: This department helps to create a new model/mother mould and trial run in production and then make a case/block mould for the moulding department.
Conclusion:
This article outlines the full production process of ceramic formers, providing a comprehensive understanding of the manufacturing process. Please let us know in the comment section if we miss something.


2 comments